
Varying-Vagrant-Vagrants, also known as VVV, is definitely a mouthful to say. However, this project on Github is unique in that it is a local development environment for WordPress. But why use it if you are already using MAMP, XAMPP or WAMP? The main reason is that these virtual servers do not mimic an actual development environment. VVV seeks to solve that problem.
VVV, or Varying-Vagrant-Vagrants works with VirtualBox. Don’t worry, it works on any operating system. If you want, you can read the instructions on the GitHub page found here.
Note that you will need to have some basic command line / terminal knowledge.
Step 1: Installing VirtualBox
The first step is to download and install VirtualBox
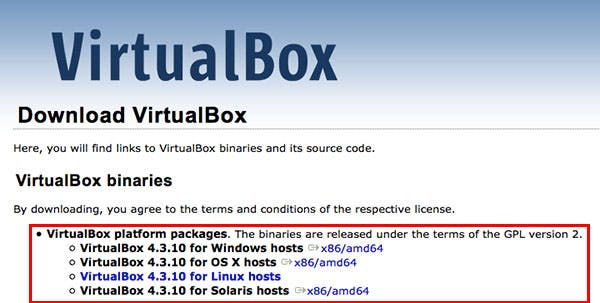
- Click on the version for your operating system
- Follow the instructions during the install process
- After installation, you should see this screen
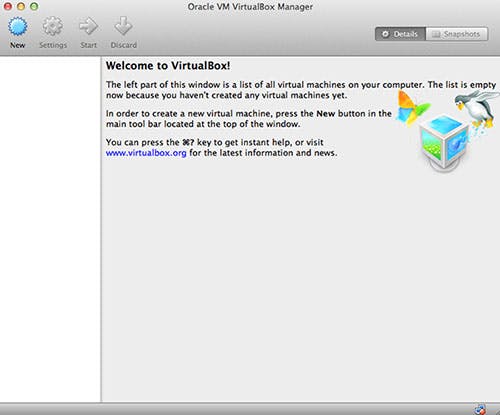
Now that you have installed a virtual machine on your computer, it’s time to install VVV.
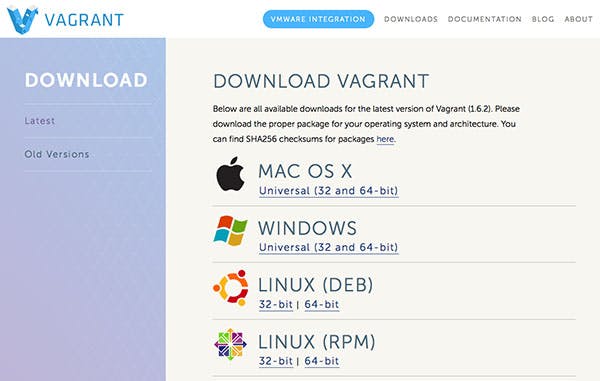
Step 2: Installing Varying-Vagrant-Vagrants
Click here to download and install VVV
-
- Download the version developed for your operating system.
Follow the instructions during the installation
- vagrant will now be available as a command in the Terminal (Mac)
- In Terminal, type vagrant -v
- If the Terminal / Console returns Version 1.6.2 or higher, then you have installed Vagrant correctly
Step 3: Installing the Host Updater Plugin
Note: This step is not necessary, but you will have to add your website hosted on the virtual machine to your hosts file.
Note 2: If you are getting errors during the installation, install Homebrew and the Norogiri gem.
This plugin updates your hosts file to make sure that you computer will be able to access the WordPress site running within VirtualBox. Although it is not neccessary, it is recommended. All you need to do is type the following command into Terminal / Console:
vagrant plugin install vagrant-hostsupdater
![]()
If the installation was successful, you should see this:
![]()
Step 4: Installing the Vagrant Triggers Plugin
Similar to the last step, install the plugin via Terminal by typing:
![]()
If the installation was successful, you should get a similar prompt as shown in the previous step.
Step 4: Git Time
According to the Github page, there are various ways to complete this step:
Using the following git command: git clone git://github.com/Varying-Vagrant-Vagrants/VVV.git vagrant-local- Download from github and extract the zip
- Download a stable release
Either way, make sure you know where the new folder is located because you will need it for the next step.
Step 5: Start it Up!
- Open Terminal / Command Prompt
- Change into the new folder you just downloaded; for example, if you folder is named ‘VVV-master’, then type cd VVV-master. (cd stands for ‘Change Directory’)
- Type in vagrant up
- The first thing that the Terminal will do is start downloading, after some time, it will ask for your password
- After you have entered your password, wait for a total of ten to twenty minutes
- Type in: http://local.wordpress.dev/ to your web browser
If you see WordPress installed then congratulations! VVV has been installed! Have any questions or issues? You can leave a comment below.
Resources
Varying Vagrant-Vagrants’s Github Page:
https://github.com/Varying-Vagrant-Vagrants/VVV