Gulp.js is a stream-based building system that, similar to Grunt, allows you to automate tasks for your project. These tasks range from minification to file concatenation. What is a stream-based build system? The Stream Handbook by substack explains:
Streams come to us from the earliest days of unix and have proven themselves over the decades as a dependable way to compose large systems out of small components that do one thing well. In unix, streams are implemented by the shell with
|pipes. In node, the built-in stream module is used by the core libraries and can also be used by user-space modules. Similar to unix, the node stream module’s primary composition operator is called.pipe()and you get a backpressure mechanism for free to throttle writes for slow consumers.– Stream Handbook by substack
In short, your application is series of ‘pipes’ or ‘tubes’. In Gulp, plugins or modules perform one small task. These small pipes build up to a larger system. This idea comes from a core UNIX philosophy as explained by Doug McIIroy:
We should have some ways of connecting programs like garden hose–screw in another segment when it becomes necessary to massage data in another way. This is the way of IO also.
– Doug McIlroy
Why Gulp.js?
Gulp is different then Grunt in different ways.
- Gulp tasks perform one task. Grunt runs multiple tasks
- Gulpfile uses Javascript code instead of Grunt’s JSON life format
- Watch is built-in, no need to install it
- Gulp also takes less code to do more things
Let’s install Gulp!
Step 1: Install Node.js
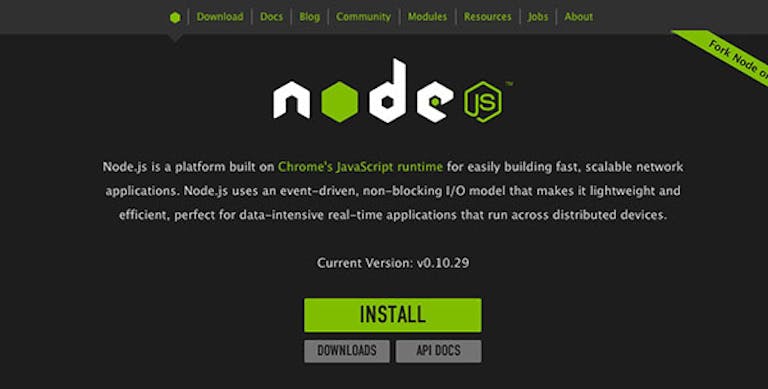
The first step, if you haven’t already, is to install Node.js.
- Click here
- Click the green ‘Install’ button
- Follow the instructions to install Node
Step 2: Install Gulp.js
The first step is to install gulp.js globally using npm. Then, start the Terminal, or Command Line, and run the following command:
npm install -g gulpFrom now on, you can use gulp as a command!
Step 3: Include in Your Projects
Let’s create a folder called ‘test’:
mkdir ~/Desktop/test
Now change into the new directory:
cd ~/Desktop/test
For node packages, you will need to create a package.json file:
vim package.json
Press the ‘i’ key. Copy and paste the following code using Command+C and Command+V respectively:
{

}
Press the ‘ESC’ key to exit out of Insert mode. Then, type in :wq to save and quit.
npm install --save-dev gulpIf you use the ‘ls’ command, you should now be able to see node_modules and package.json:
ls
The next step is to install gulp.js into your project. You can do this by running the following command:
npm install --save-dev gulpStep 4: Plugin and Gulpfile.js
It is time to create the gulpfile.js file into your root directory. You can use a text editor, such as Sublime Text 2 and save as Gulpfile.js. Here’s a starter template from the Getting Started page:
var gulp = require('gulp');

gulp.task('default', function() {
  // place code for your default task here
});
Let’s install a plugin to see how this all comes together. Head back into the Terminal/Command Line and run the following:
npm install --save-dev gulp-jsmin
Next, let’s create a folder and Javascript file so that Gulp can run its task:
mkdir js
Let’s use the VIM editor again to create the file
vim js/test.js
Finally, copy and paste the following into the VIM editor using the Insert mode:
//this is a test file
alert('Hello!');
Use the VIM editor to configure the plugin. If you need help, please refer to the step above:
vim gulpfile.js
var gulp = require('gulp');
var jsmin = require('gulp-jsmin');

gulp.task('default', function () {
    return gulp.src('js/*.js')
        .pipe(jsmin())
        .pipe(gulp.dest('js/min'))
});
Note: Make sure that the code above has been copied correctly
Step 5: Using the Gulp command
You can run gulp in the terminal/command line by running the following command:
gulp
If you see a message similar to the image above, then gulp has run the task successfully.
The command above runs all of the tasks. If you would only like to run a task by itself, you can use the following structure:
gulp <task> <othertask>
Resources
If you would like to learn more or are confused, please refer to the resources below. Enjoy!
Gulp Presentation
http://slides.com/contra/gulp#/
Get Started Guide
https://github.com/gulpjs/gulp/blob/master/docs/getting-started.md
Team Treehouse Video
What is gulp.js?
http://travismaynard.com/writing/no-need-to-grunt-take-a-gulp-of-fresh-air
Presentation Build Wars – A Comparison between Grunt and gulp.js
http://markdalgleish.github.io/presentation-build-wars-gulp-vs-grunt/