You may have read the other post about setting up a local WordPress environment with Varying Vagrant Vagrants, or VVV, for short. But what if you wanted another configuration, especially if you work in a Japanese-based environment. Vagrant Chef Centos WordPress is perfect for that. VCCW has the following features:
- This Vagrant configuration has various settings you can change:
- Multisite
- Force SSL Admin
- Subdirectory installation (e.g. http://wordpress.local/wp/)
- Customizable URL (default: http://wordpress.local/)
- Debug mode is enabled by default
- SSL is enabled by default
- Automatic installation & activation of plugins and themes at the time of provisioning:
- default plugins: theme-check, plugin-check, dynamic-hostname
- default theme: none
- Optional import of theme unit test data
- Pre-installed wp-cli
- Shares folders between Host and Guest OS
Notice that you get three plugins from the start: theme-check, plugin-check and dynamic-hostname; all of which are great for theme and plugin development. This configuration also uses Apache, unlike VVV , which uses NGINX. There is another plus for Japanese users: if your WordPress is in Japanese, you will also have Multibyte Patch, by Seisuke Kuraishi, installed and ready to go. This is thanks to the contributors, such as Automattic’s Naoko Takano.
The following errors in this article were pointed out on Facebook.
The author of Multi-byte Patch is Seisuke Kuraishi.
Naoko Takano’s name is, the correct kanji is 直子. Sorry for the error. (Japanese Article)
VCCW’s author is Takayuki Miyauchi and you can see his blog here: firegoby.jp
Let’s set up another local environment, this time with VCCW; if you have already installed VirtualBox, Vagrant, Hosts Updater plugin and the Triggers plugin, feel free to skip the first two steps. Otherwise, if you would like to learn about VVV instead, click here.
Note that you will need to have some basic command line / terminal knowledge.
Let’s get started!
Step 1: Installing VirtualBox
The first step is to download and install VirtualBox
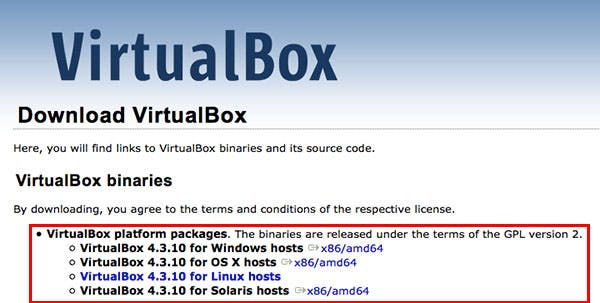
- Click on the version for your operating system
- Follow the instructions during the install process
- After installation, you should see this screen
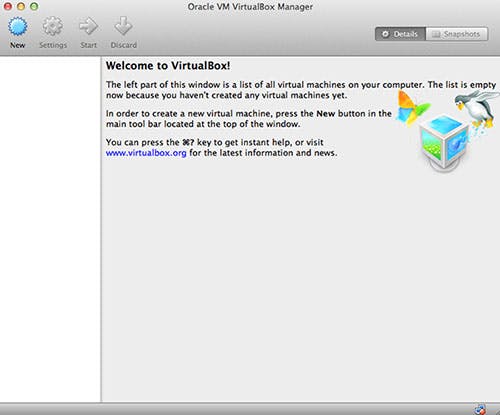
Now that you have installed a virtual machine on your computer, it’s time to install VVV.
Step 2: Installing the Host Updater Plugin
Note: This step is not necessary, but you will have to add your website hosted on the virtual machine to your hosts file.
Note 2: If you are getting errors during the installation, install Homebrew and the Norogiri gem.
This plugin updates your hosts file to make sure that you computer will be able to access the WordPress site running within VirtualBox. Although it is not neccessary, it is recommended. All you need to do is type the following command into Terminal / Console:
vagrant plugin install vagrant-hostsupdater
![]()
If the installation was successful, you should see this:
![]()
Step 3: Download VCCW
Just as with VVV, there are multiple ways to downlaod and install a VCCW.
- You can download from the website here. On the right side, you can download the folder in two formats: zip and tar zip
- Start up Terminal (Go -> Utilities -> Terminal), create a new folder and
git clone git@github:miya0001/vccw.git like so:

Step 4: Setting up VCCW
Now that you have the folder downloaded/clone, let’s start setting VCCW up:
-
-
-
- Change into the new directory by typing: cd vccw
cd vccw - Type the following into the console to copy the vagrant file into the new directory
cp Vagrantfile.sample Vagrantfile - Finally, just type in this last piece of code:
vagrant up
- Change into the new directory by typing: cd vccw
-
-
Your terminal should now be downloading the package. If the terminal returns an error, make sure that you have a Vagrantfile in your directory! Or at least a Vagrantfile.sample (repeat step 2 if Vagrantfile doesn’t exist). If the terminal asks for your password, all you have to do is type it in and it will update/create the hosts file for you.
Step 5: Accessing your website
You can by visting http://wordpress.local/ or http://192.168.33.10/
To access wp-admin:
Username: admin
Password: admin
You should now be able to access your WordPress installation. If you have any questions, you can always leave a comment below!