Advanced Custom Fields also has Paypal and WYSIWYG custom fields that you can add to your posts or pages. Let’s install them add them to our posts! Today, we will be installing and using two addons: a custom field for Paypal, and another that is a WYSIWYG field.
Step 1: Install and Activate
The first step, as always is to install and activate the plugin. You can download the addons from this site.
Paypal Field
WordPress WYSIWYG
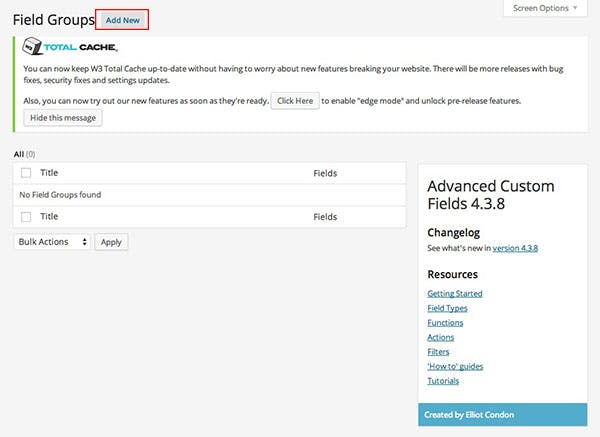
Step 2: Creating a Field Group
Head to the Custom Field Main Screen by clicking on the Custom Fields menu bar:

Click on ‘Add New’:

Paypal
After clicking the Add Field Button, and selecting ‘Paypal Item’ as your field type, you should be able to see this screen:

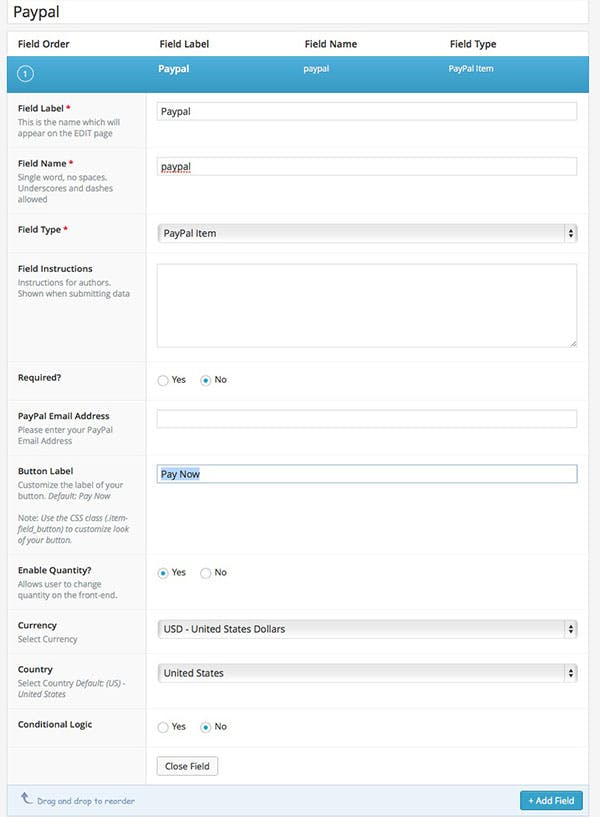
Let’s take a closer look at the last four options:


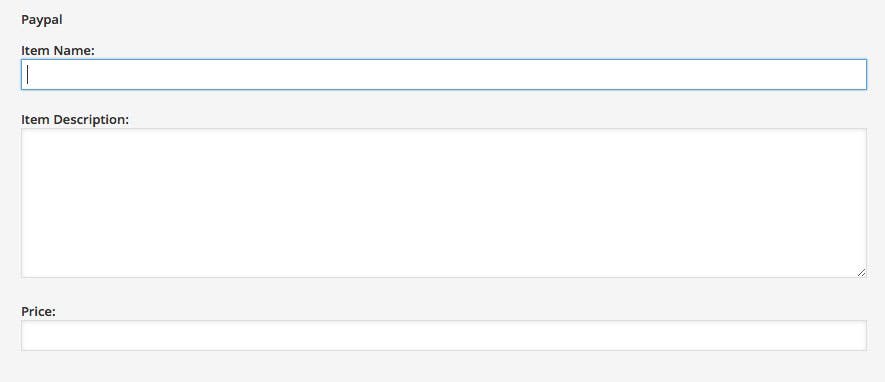
In Your Editor
In your Post Editor, you can now insert the following data into your post:

Enter the Code
Enter the following code into your single.php or page.php file.
<?php the_field('paypal'); ?>


WordPress WYSIWYG Editor
The WordPress WYSIWYG (What You See Is What You Get) adds a visual editor to your WordPress Post. WordPress WYSIWYG is a plugin all in itself. You will need to follow the same process as shown above. This time, you might need to create a new field group and then use the following code to display the WYSIWYG Editor in your post.
<?php the_field('wysiwyg'); ?>
That’s all there is to it.