If you work alone or in a group, it’s important to remain consistent. Writing documentation and style guides, however, takes up a lot of time. Thankfully, there’s a plugin for that called StyleDooco that can do just that. The plugin takes the comments in a CSS file and generates an HTML file. The plugin requires you to install NodeJS. There’s also a Grunt plugin that you can use for your projects; you can also find the project on GitHub. Let’s take a look at the Grunt plugin and how to install and configure it for your project.
Preview
Let’s take a look at what the plugin actually does. If you have a CSS file, such like this:
.btn {
  display: inline-block;
  padding: 4px 10px 4px;
  margin-bottom: 0; // For input.btn
  font-size: @baseFontSize;
  line-height: @baseLineHeight;
  color: @grayDark;
  text-align: center;
  text-shadow: 0 1px 1px rgba(255,255,255,.75);
  vertical-align: middle;
  .buttonBackground(@white, darken(@white, 10%));
  border: 1px solid #ccc;
  border-bottom-color: #bbb;
  .border-radius(4px);
  @shadow: inset 0 1px 0 rgba(255,255,255,.2), 0 1px 2px rgba(0,0,0,.05);
  .box-shadow(@shadow);
  cursor: pointer;

  // Give IE7 some love
  .reset-filter();
  .ie7-restore-left-whitespace();
}


.btn:hover {
  color: @grayDark;
  text-decoration: none;
  background-color: darken(@white, 10%);
  background-position: 0 -15px;

  // transition is only when going to hover, otherwise the background
  // behind the gradient (there for IE<=9 fallback) gets mismatched
  .transition(background-position .1s linear);
}


.btn:focus {
  .tab-focus();
}

.btn.active,
.btn:active {
  background-image: none;
  @shadow: inset 0 2px 4px rgba(0,0,0,.15), 0 1px 2px rgba(0,0,0,.05);
  .box-shadow(@shadow);
  background-color: darken(@white, 10%);
  background-color: darken(@white, 15%) e("\9");
  outline: 0;
}


.btn.disabled,
.btn[disabled] {
  cursor: default;
  background-image: none;
  background-color: darken(@white, 10%);
  .opacity(65);
  .box-shadow(none);
}
Then, it will take the CSS, pass it through Markdown and then export it as an HTML file like so:
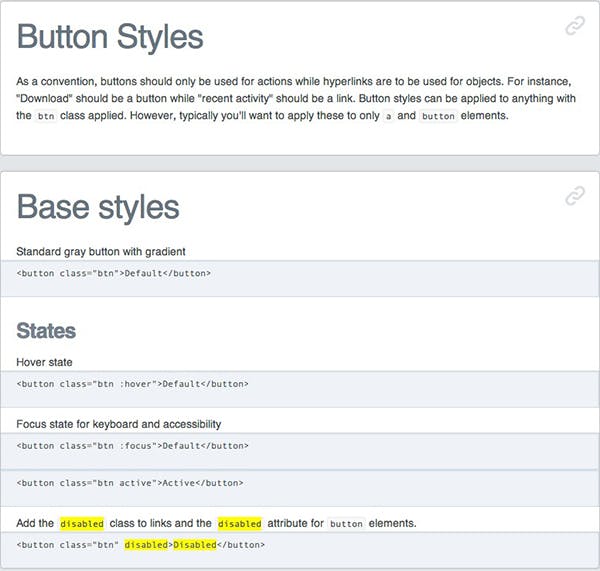
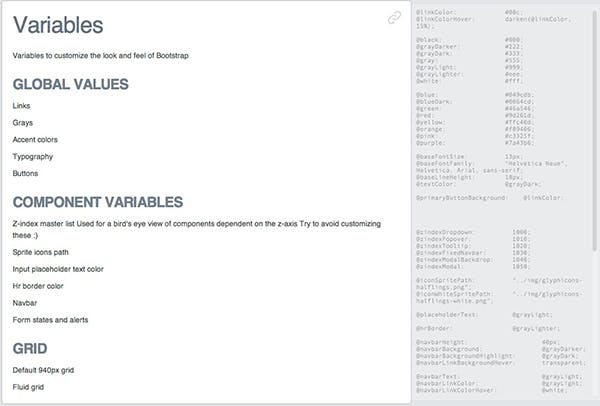
Here’s another example:
Let’s try it out!
Installing NodeJS
You will need to download and install NodeJS first.
Installing and Using with Grunt
Installing Grunt is simple, all you need to do is run this command in Terminal:
npm install -g grunt-cli
npm install -g styledocco
The npm is Node’s package manager tool, install is the command, -g is a flag used to install the Node package globally on your machine. This means that you will be able to run the command anywhere. Finally, grunt-cli is the name of the node package. Run the following commands to create a new folder on your desktop, change into the directory and to install the plugin.
cd ~/Desktop
mkdir styledocco
cd ~/Desktop/styledocco
npm init
npm install grunt --save-dev
npm install grunt-styledocco --save-dev
If you get an error message, you can just add the sudo command:
sudo npm install grunt --save-dev
sudo npm install grunt-styledocco --save-dev
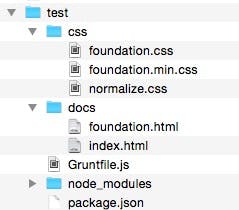
For this tutorial, I have downloaded Foundation and moved the CSS files from Foundation over to test/css. Here’s what my directory structure looks like:
This is what should go inside the Gruntfile.js:
module.exports = function(grunt) {
grunt.initConfig({
  styledocco: {
    dist: {
      options: {
        name: 'My Project'
      },
      files: {
        'docs': 'css/foundation.css'
      }
    }
  }
});

grunt.loadNpmTasks('grunt-styledocco');

grunt.registerTask('default', ['styledocco']);
}
You can use either Sublime Text 2 or VIM in order to add the following code to the top of your css file. Here’s an example:
/*
#Header 1
<h1>test</h1>
#Header 2
<h2>test</h2>
#Header 3
<h3>test</h3>
#Header 4
<h4>test</h4>
#Header 5
<h5>test</h5>
#Header 6
<h6>test</h6>
@Small, Simple Button
<p><a href="#" class="small button">Simple Button</a><br/>
   #Small Radius Button
    <a href="#" class="small radius button">Radius Button</a><br/>
#Small Round Button
<a href="#" class="small round button">Round Button</a><br/>
#Medium Success Button
<a href="#" class="medium success button">Success Btn</a><br/>
#Medium Alert Button
<a href="#" class="medium alert button">Alert Btn</a><br/>
#Medium Secondary Button
<a href="#" class="medium secondary button">Secondary Btn</a></p>
<h5>We bet you’ll need a form somewhere:</h5>
<form>
<div class="row">
<div class="large-12 columns">
<label>Input Label</label>
<input type="text" placeholder="large-12.columns" />
</div>
</div>
<div class="row">
<div class="large-4 medium-4 columns">
<label>Input Label</label>
<input type="text" placeholder="large-4.columns" />
</div>
<div class="large-4 medium-4 columns">
<label>Input Label</label>
<input type="text" placeholder="large-4.columns" />
</div>
<div class="large-4 medium-4 columns">
<div class="row collapse">
<label>Input Label</label>
<div class="small-9 columns">
<input type="text" placeholder="small-9.columns" />
</div>
<div class="small-3 columns">
<span class="postfix">.com</span>
</div>
</div>
</div>
</div>
<div class="row">
<div class="large-12 columns">
<label>Select Box</label>
<select>
<option value="husker">Husker</option>
<option value="starbuck">Starbuck</option>
<option value="hotdog">Hot Dog</option>
<option value="apollo">Apollo</option>
</select>
</div>
</div>
<div class="row">
<div class="large-6 medium-6 columns">
<label>Choose Your Favorite</label>
<input type="radio" name="pokemon" value="Red" id="pokemonRed"><label for="pokemonRed">Radio 1</label>
<input type="radio" name="pokemon" value="Blue" id="pokemonBlue"><label for="pokemonBlue">Radio 2</label>
</div>
<div class="large-6 medium-6 columns">
<label>Check these out</label>
<input id="checkbox1" type="checkbox"><label for="checkbox1">Checkbox 1</label>
<input id="checkbox2" type="checkbox"><label for="checkbox2">Checkbox 2</label>
</div>
</div>
<div class="row">
<div class="large-12 columns">
<label>Textarea Label</label>
<textarea placeholder="small-12.columns"></textarea>
</div>
</div>
</form>
</div>
*/
Note: When using styledocco, spaces are important. Whatever you do, don’t use tabs, use spaces! Otherwise, the page/elements might break!
What you are looking at is, in essence, a CSS comment. However, thanks to styledocco, you can use Markdown. When styledocco compiles, it will take the CSS comment, parse the Markdown and create a brand new HTML document. In this case, it will create a docs folder. Be sure to save you file.
Now you just need to run the grunt command and it should create a new doc folder.
grunt

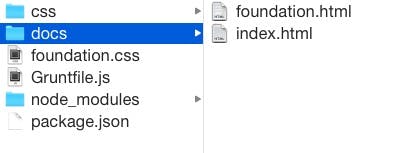
If everything has gone as planned, then you should see the new docs folder as well as two HTML files.
In the end, the newly generated HTML page should look something like this:
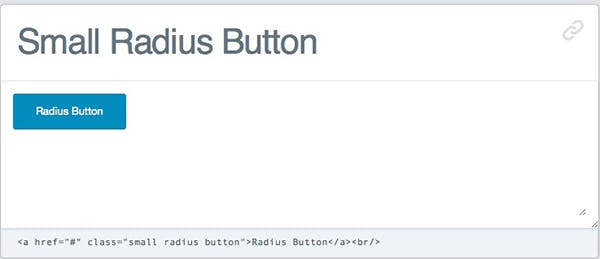
Here’s what it looks like in the CSS file:
#Small Radius Button
<a href="#" class="small radius button">Radius Button</a><br/>
Everything should now be set up and ready to go. If you have any questions, feel free to leave a comment below.