
As a marketer, making sure that your sales team is kept up to speed about things that are happening on your website or in your marketing database is incredibly important. Up until now, marketers using HubSpot had to rely mostly on email to update their sales team on details about their leads.
With the new Salesforce tasks feature, Salesforce integrated customers will have the option to set tasks on their sales team’s contact records inside of Salesforce. This is a very commonly requested feature that we are excited to announce.
What is it?
Look at a lead or contact record in Salesforce, and you’ll see sections labeled “Open Activities” and “Activity History”. These sections often contain tasks that need to or have been carried out for a specific individual, and “events” associated with the individual.
Marketers using HubSpot can now create tasks in this section of their integrated Salesforce instance using the workflows tool when a contact fills out a form or is added to a list.
Example use cases
With the new Salesforce Tasks feature, you could – – Set a task for the lead owner to follow up with a lead when they hit a certain lead score threshold – Set a task for an account manager to check in with a contact 60 days after they become a customer – Set a completed task when a lead completes an important action (for example, visits your pricing page, or clicks on a payment link)
Some Cool Use Cases:
- Assign a Sales Rep a task to follow up with a lead if they have not filled out a form in the last 60 days
- Assign a Sales Rep a task to get an invoice cleared with Finance when a deal has been marked as Closed Won.
- Assign a Sales Rep a task to contact a lead when they reach a score of 85 or more
For our example, we’ll be using the last example above, triggering a Salesforce Task whenever a contact has reached a score of 85 or more.
How does it work?
Setting a Salesforce task with Workflows is easy. Simply create a workflow, add a step, and in the “Select an Action” dropdown, select “Set a Salesforce Task”. Fill in the options and you are up and running.
When a contact runs through an active workflow with “Set a Salesforce Task” as one of the actions, a task will appear on that contact record. The salesperson will then see that task when they manually review the lead or contact record, or if they have a report they use to see tasks that have been assigned to them (many teams use this method of keeping track of their tasks.)
Step1
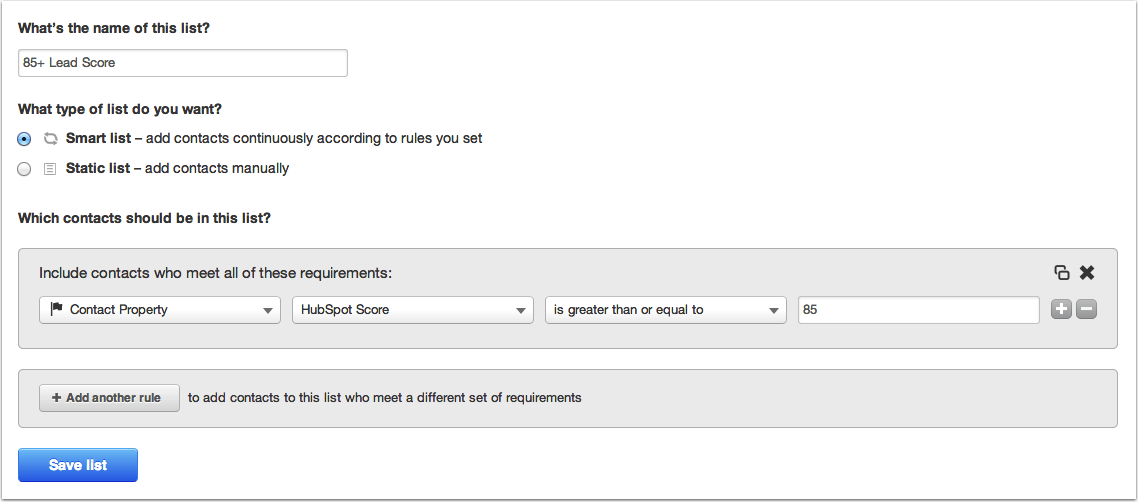
First, create a list that acts as the criteria a contact must meet to have a Task created on their Salesforce record.
Step2
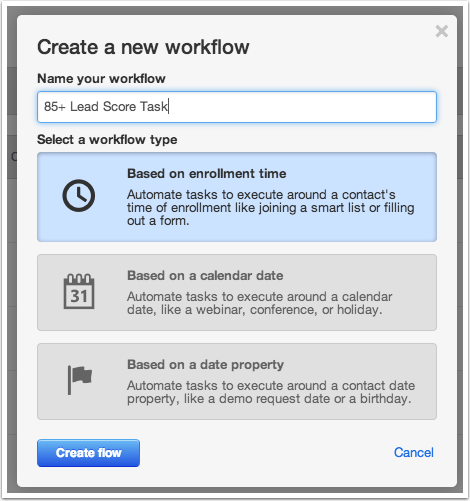
Create a workflow by going to Contacts > Workflows > Create New Workflow. Then, name your workflow, and make sure that it’s type is Based on enrollment time.
Step3
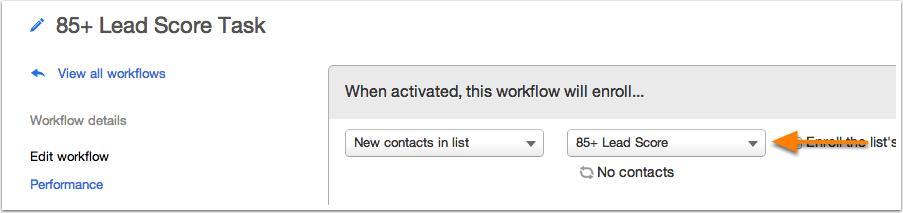
Now, choose to enroll contacts in the workflow when they become members of your new list.
Step4
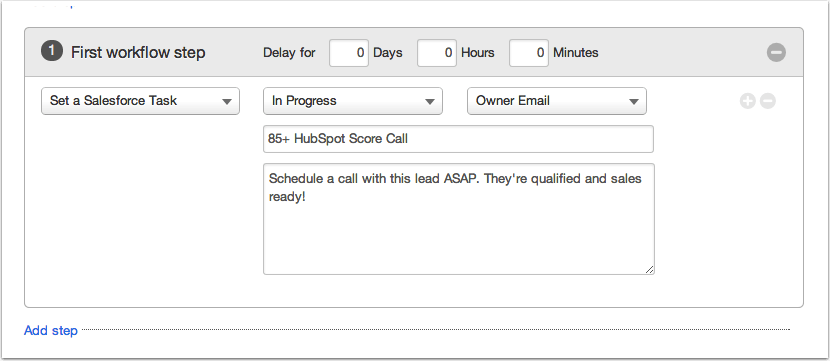
Add a Salesforce Task as a step in your workflow by selecting it from the Select an action dropdown.

Step5
Setting the task is broken up into four distinct components:
- Select a status allows you to decide what the status of the Task should be when it’s assigned to the rep.
- Assigned to enables assigning the task to the owner of the contact or the integration user, the admin who set up the integration.
- Subject Line names the task the way it will be seen on the record in Salesforce
- Comments lets you add color for your reps.
Save your workflow and you’re reps will start receiving tasks every time a lead meets the criteria of the list assigned to them!